Settings holds the details that apply to your whole shop: your business name, the time zone and language used for dates and prices, the private address on your shipping labels, your workspace menu, and access for AI assistants. Only owners and admins can change them. This guide follows Mara Quinn setting up Saltbush Ceramics in Fremantle.
Each panel saves on its own. While a panel has changes you have not saved, Unsaved changes shows beside its save button. If you go to another page first, Stallee asks Leave Without Saving? Choose Stay to go back and save, or Discard Changes to leave without them.
Change Your Business Name
Your business name is what your website, search results, product feeds and emails to customers call your shop. You choose it when you create the shop, and owners and admins can change it later.
- Open Settings, then find Business Name.
- Type the name your customers know your business by.
- Choose Save Name. The message Business name saved. confirms it.
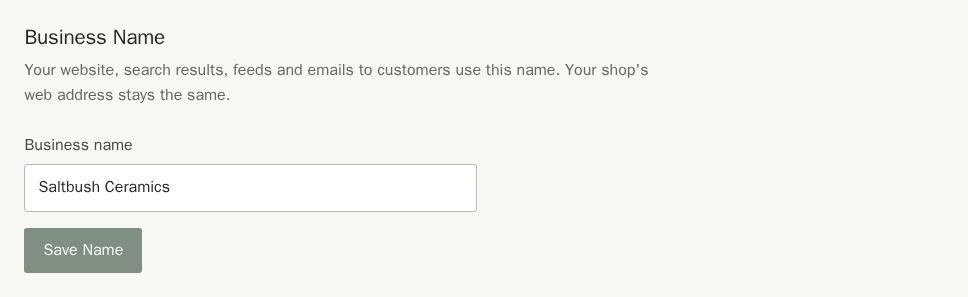
The shop menu shows the new name straight away, and your website and new emails use it within a few minutes. Your shop's web address does not change, and nor do any domains you have connected. If you set your own browser title or a logo with your name in Site Design, change them there too.
Choose Your Workspace Menu
Keep the menu focused on the tools your shop uses. Owners and admins choose the optional links for everyone in the shop. The same choices apply to the buttons under Your Shop on Home.
- Open Settings, then find Workspace Menu.
- Tick the tools you want to show, or untick tools you want to hide.
- Choose Save Workspace Menu. The message Workspace menu saved. confirms it.
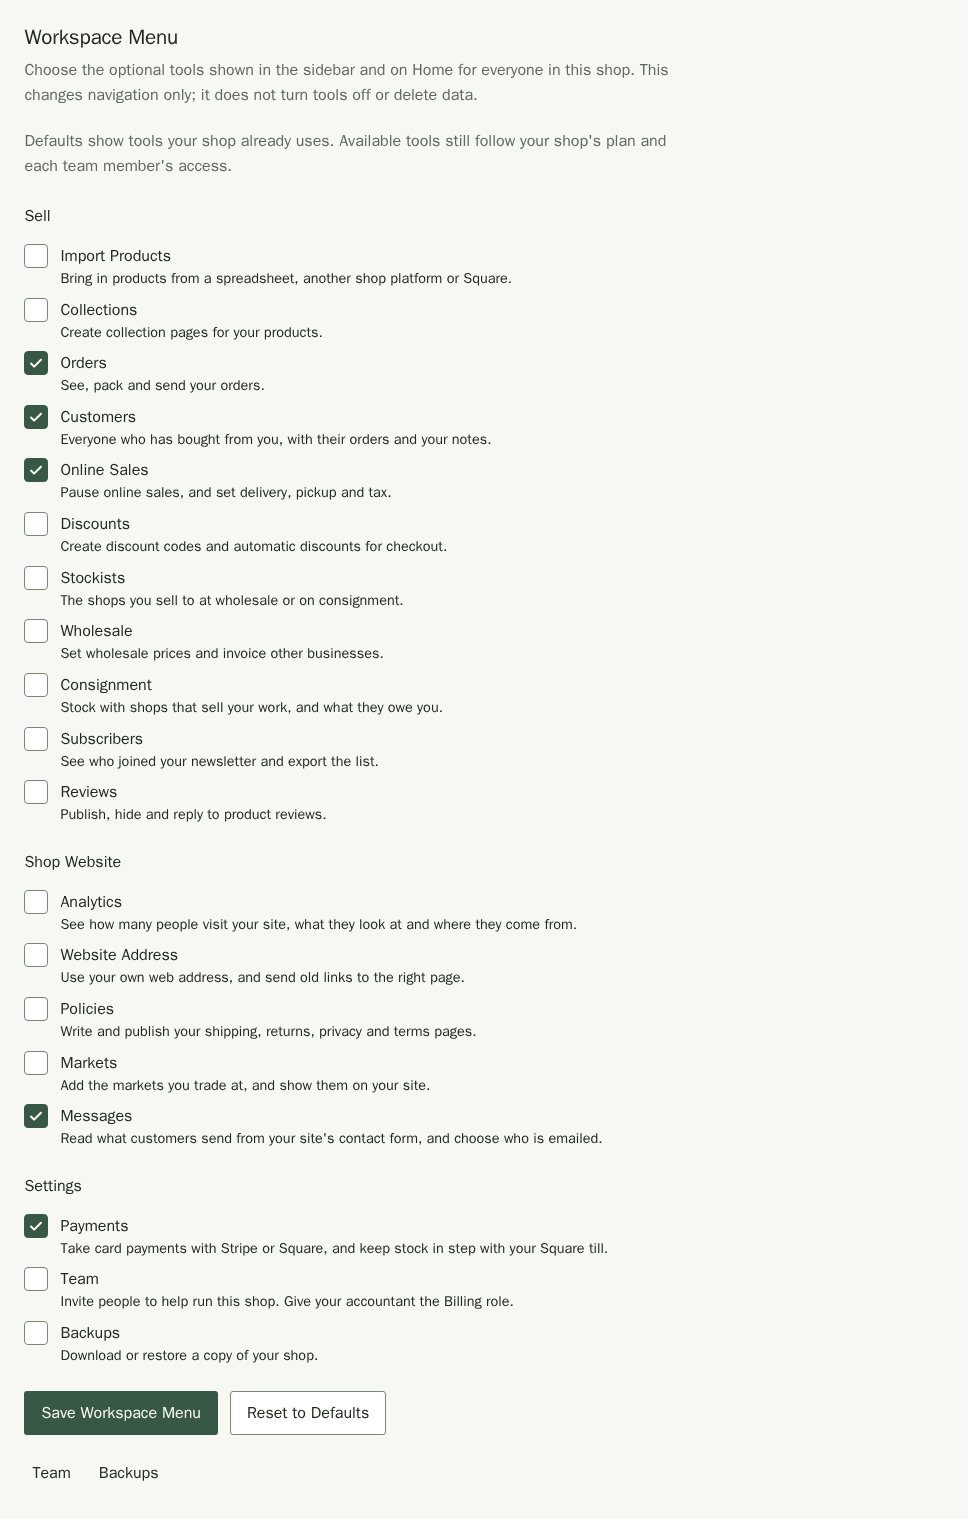
Defaults show tools your shop already uses. Choose Reset to Defaults to remove your saved choices and use those defaults again. A tool you explicitly hide stays hidden until you show it again or reset the menu, even when your shop has data in that tool.
Hiding a link does not turn the tool off or delete its data. You can still open its address directly if your plan and role allow it. Showing a link does not give anyone extra access. Home, Products, Sales, Site Design and Settings stay available to the plans and roles that include them.
The links to Team and Backups stay in Settings even when hidden from the menu. To close the selected business, owners open Account and find Close Business. See Closing your business.
Set Your Time Zone, Language and Currency
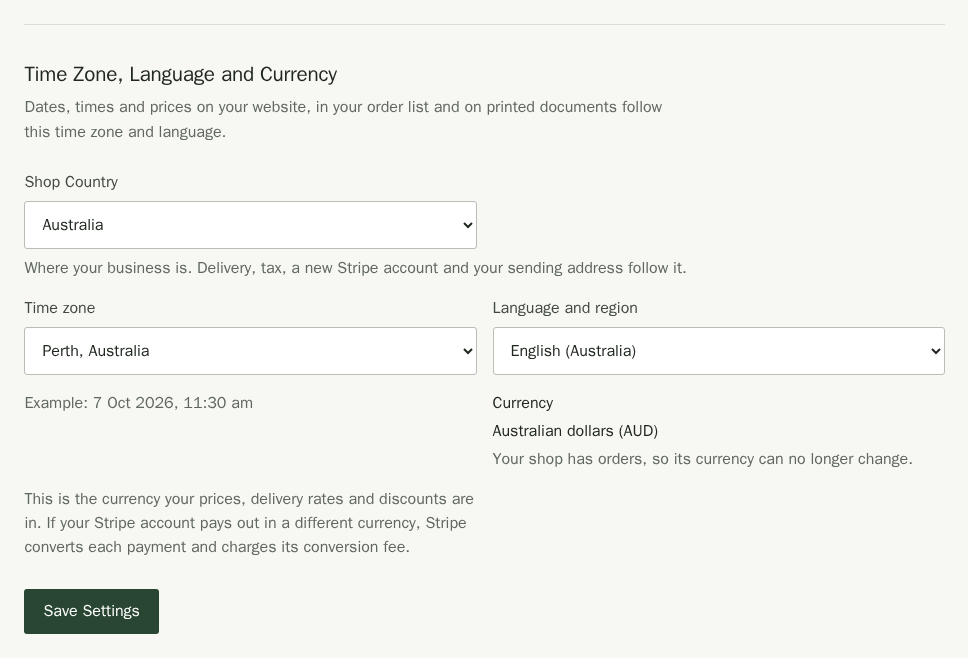
Dates, times and prices on your site, in your order list and on printed documents follow these settings. Set them once, so everything reads the way your customers expect.
- Open Settings in the menu.
- Under Time Zone, Language and Currency, choose your Time zone, for example Perth, Australia.
- Choose your Language and region, for example English (Australia).
- Check the example date underneath, then choose Save Settings.
Choose Your Shop's Currency
Your shop has one currency. Your product prices, delivery prices and discounts are all in it, so you will not see a currency beside each price. Choose from Australian dollars (AUD), New Zealand dollars (NZD), US dollars (USD), British pounds (GBP), euros (EUR) or Canadian dollars (CAD). Every shop starts as AUD unless you choose another when you create it.
- Open Settings in the menu.
- Under Time Zone, Language and Currency, choose a Currency, then choose Save Settings.
- Stallee asks you to confirm. Choose Yes, Change Currency.
- Check your product prices, delivery prices and discounts. They keep their numbers and take the new currency, so a 50.00 mug that was AUD is now 50.00 in the new currency. Nothing is converted.
You can change the currency only until your shop has an order, a wholesale invoice or a stockist statement, and only while Square is not connected. After that the currency shows as fixed, with a note explaining why. Orders you have already taken stay in the currency they were paid in.
- Customers always pay in your shop's currency. If your Stripe account pays out in a different currency, Stripe converts each payment and charges its conversion fee.
- Wholesale invoices and stockist statements are in your shop's currency too. Each one keeps the currency it was issued in.
- A Square location can take your payments only if it uses your shop's currency. Square does not operate in New Zealand.
Set Your Shop Country
Shop Country says where your business is. You chose it when you created your shop, and delivery, tax, a new Stripe account and your sending address follow it. It is separate from your currency: changing one does not change the other.
- Open Settings in the menu.
- Under Time Zone, Language and Currency, choose your Shop Country, then choose Save Settings.
- Check your delivery prices and tax in Online Sales, and save your sending address again for the new country.
Set the country before you connect Stripe. A Stripe account you already connected stays in the country it was set up for. If your shop is registered for tax and the new country has no tax in Stallee, turn the registration off in Online Sales first. Only owners and admins can change the country.
Add Your Sending and Return Address
This is the private address that goes on your printed shipping labels as the return address, under your shop name. Customers do not see it on your site. It is separate from the business address you can share with search engines in Site Design. The address is in your shop's country: Australia, unless you set Shop Country in Online Sales to New Zealand, the United Kingdom or the United States.
- Under Sending and Return Address, fill in Address line 1 and, if you need it, Address line 2.
- Fill in Suburb or town, choose your State or territory and type your four-digit Postcode. A shop in another country sees that country's fields instead:
- New Zealand: Town or city, an optional Region and a four-digit Postcode.
- United Kingdom: Town or city, an optional County and a Postcode such as SW1A 1AA.
- United States: City, State and a ZIP code.
- Choose Save Address. The message Sending address saved. confirms it.
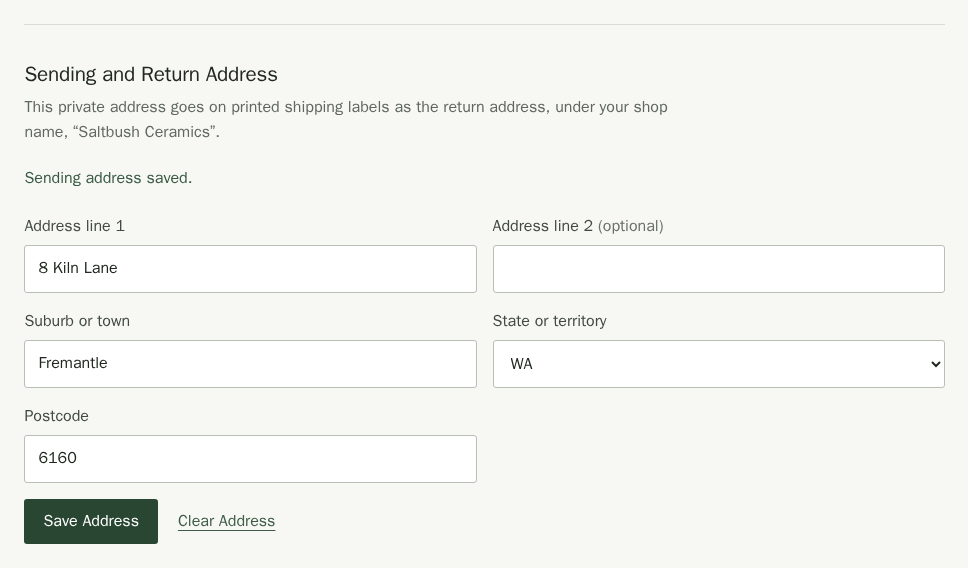
To remove the address, choose Clear Address, then confirm in the box Clear Sending Address?. Choose Keep Address to cancel. You print labels from Orders.
If you change Shop Country later, save this address again for the new country. Until you do, labels keep printing the address you saved before.
Where Delivery and Online Sales Are Set
Delivery prices, local pickup and the stock you keep back are on the Online sales page, under Delivery, Tax and Stock. Your site's own message for paused sales is in Site Design.
Serve a Google Product Feed
Owners and admins on a Pro shop in Australia that sells in Australian dollars will find Google Product Feed in Settings. It serves your products as a file from your own domain name so Google Merchant Center can fetch them. Turning it on does not send anything to Google or mean Google has approved your products. See Google Product Feed for the brand, GTIN and part number each product needs.
Connect an AI Assistant
If you use an AI assistant such as Claude, you can connect it to your shop so it can answer questions about your products, stock and orders, and make changes if you allow it. You do not need this to run your shop.
Under Apps and AI Assistants, the Connect an AI Assistant panel shows your shop’s Connection address, for example https://app.stallee.xyz/mcp/saltbush-ceramics. Choose Copy Address to copy it.
Each shop has its own address, ending in its shop address. If you run more than one shop, open each shop in turn and add a separate connector for each, with that shop’s address. A connector only ever reaches the shop you approved it for.
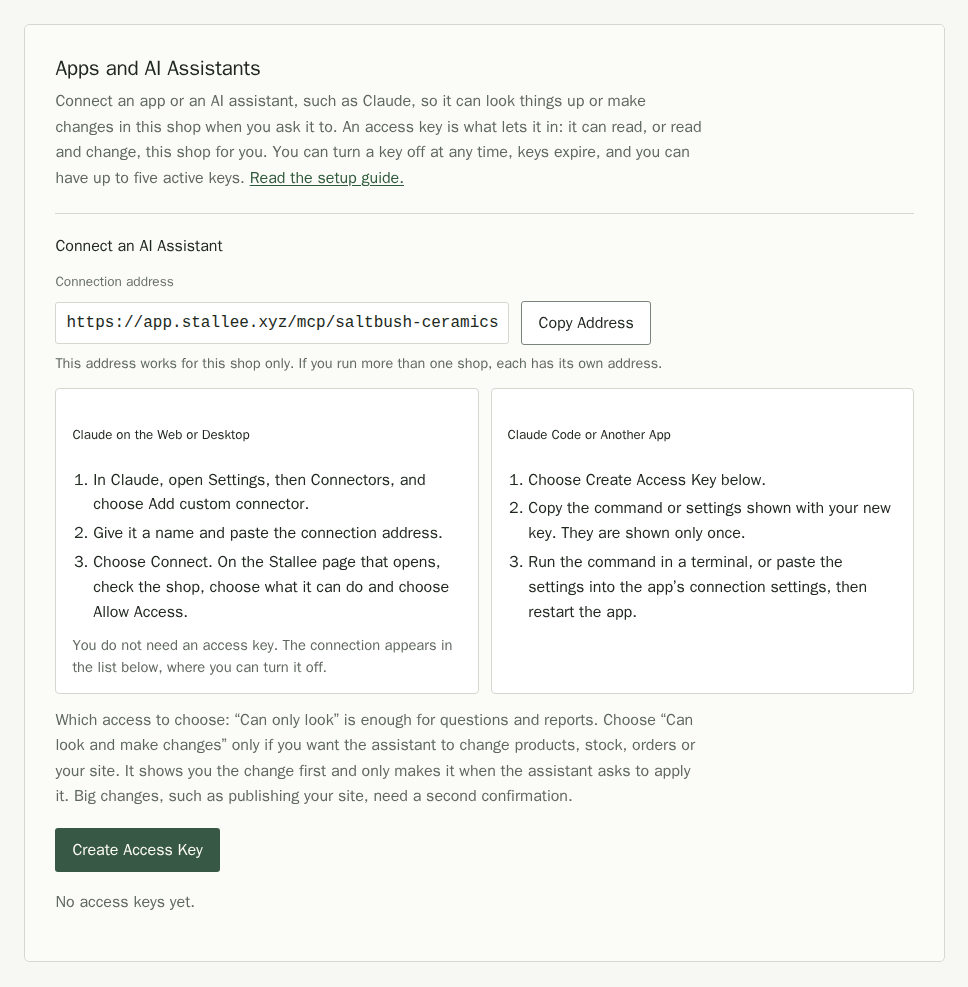
Connect Claude on the Web or Desktop
Claude on the web and the Claude desktop app connect without an access key. You approve the connection on a Stallee page instead.
- In Claude, open Settings, then Connectors, and choose Add custom connector.
- Give it a name, for example Saltbush Ceramics, and paste the connection address.
- Choose Connect. A Stallee page opens. Sign in if we ask you to. The page says Stallee has not verified the app; that is expected when you started the connection yourself.
- Check that the page names your shop. If a different shop is open, the page asks you to open the shop the address belongs to: choose Open and the shop’s name.
- Under What Can It Do?, choose Can only look or Can look and make changes. For look-only access, choose Allow Access. For changes, choose Send Confirmation Email, open the link in the same signed-in browser within 10 minutes and then choose Allow Access. You return to Claude, ready to go.
The connection then appears in your list under Apps and AI assistants as a Connected app.
Connect Claude Code or Another App
Claude Code and most other apps connect with an access key. A key expires, and it stops working the moment you turn it off or lose access. You can have up to five active keys.
- Under Apps and AI Assistants, choose Create Access Key.
- Name the key after the assistant that will use it, in Key name.
- Choose the Access, then when it should expire in Expires after: 30 days, 90 days, 180 days or one year.
- For a look-only key, choose Create Key. For a key that can make changes, choose Email Confirmation Link, open the link in the same signed-in browser within 10 minutes, then choose Create Key. If the link expires, request a fresh email.
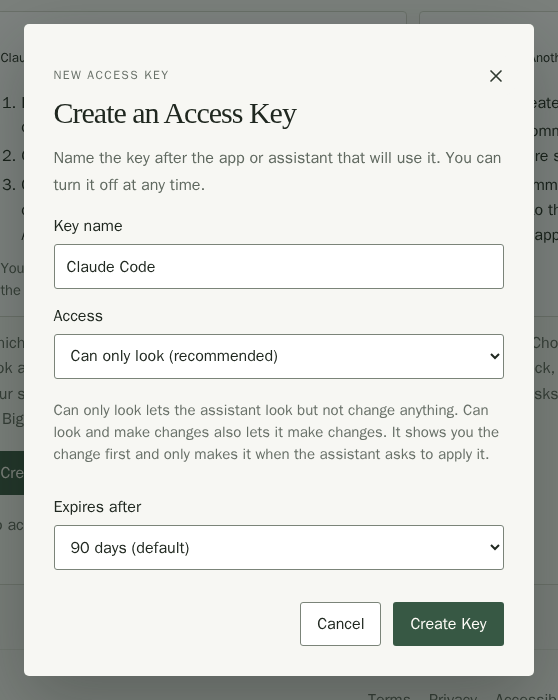
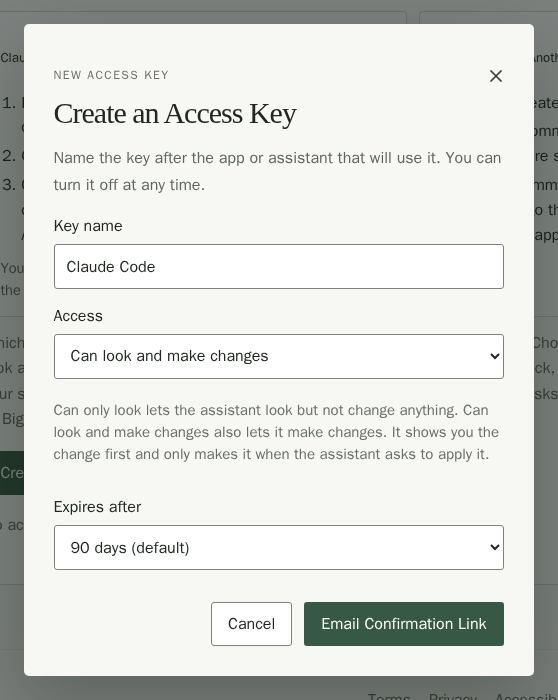
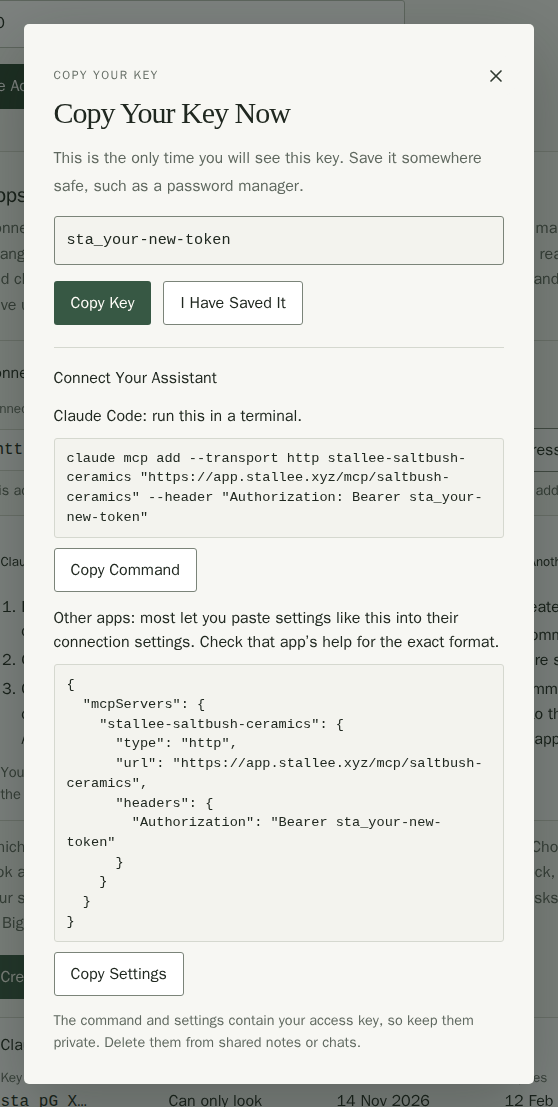
The next box shows your new key once, with everything you need to connect it. We never show the key again, so finish here before you close the box.
- For Claude Code, choose Copy Command, paste the command into a terminal and run it.
- For another app, choose Copy Settings and paste them into the app’s connection settings, then restart it. Some apps use a slightly different format, so check the app’s own help.
- To keep a copy, choose Copy Key and save it in a password manager.
- Choose I Have Saved It.
The command and settings contain your access key, so keep them private.
Choose What the Assistant Can Do
Images and fonts imported by an assistant need a public HTTPS address. Some hosting and tunnel addresses are blocked. If an import fails, download the file yourself and upload it in Products or Site Design.
Can only look lets the assistant look but not change anything. It suits questions and reports, such as a monthly sales summary or a list of low stock. Choose Can look and make changes only when you want the assistant to change products, stock, orders or your site.
When it can make changes, it shows you the change first and only makes it when the assistant asks to apply it. Big changes, such as publishing your site, need a second confirmation. Check what the assistant plans to do before you agree to it.
Turn Off Access
Each key and connection in the list shows whether it is active, expired or turned off. Choose Turn Off on an active one to stop it at any time. The assistant stops working with your shop straight away.