The floorplan editor lets you design a stall layout for a specific event date, assign spaces and equipment to stallholders, and import a previous layout as a starting point. Floorplans are private drafts — they are never shown to the public. This guide follows Mara Quinn, organiser of the Saltbush Ceramics Market.
Opening the Floorplan Editor
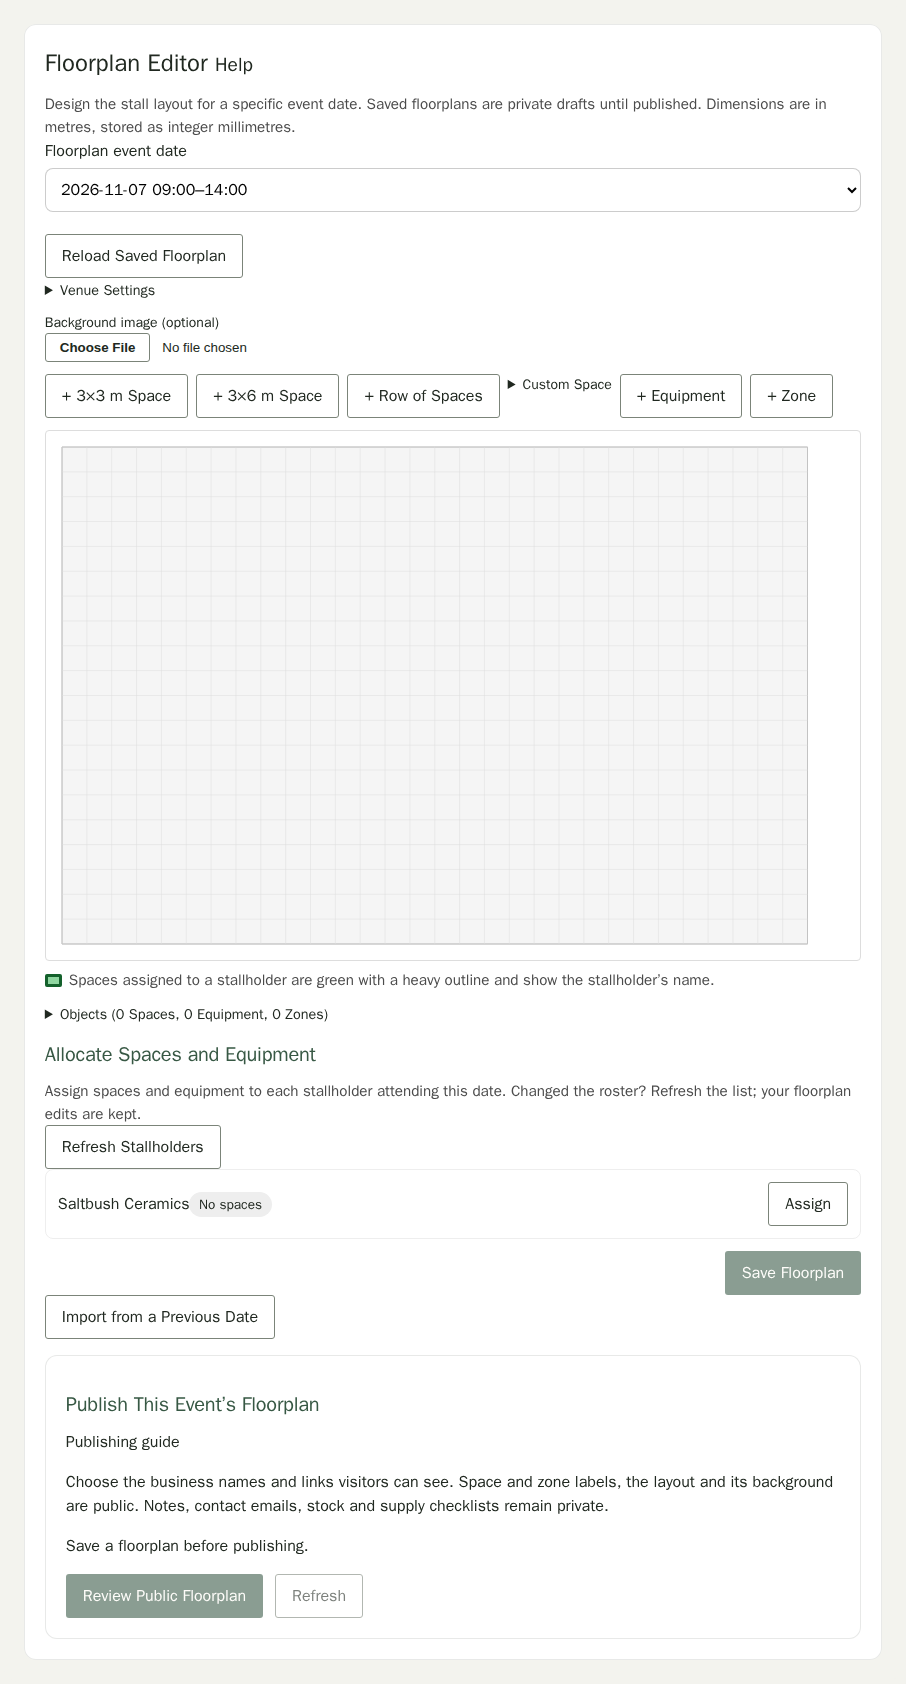
In your organiser workspace, choose Your Markets, then Edit beside the market. In the menu under the market's name, choose Floorplan. Choose a date from Floorplan event date.
Setting Up the Venue
Expand Venue Settings to enter the venue's physical width and height. Enter measurements in metres or millimetres — choose from the unit selector. The grid size controls how tightly spaces snap when you drag them; the default 100 mm suits most outdoor venues.
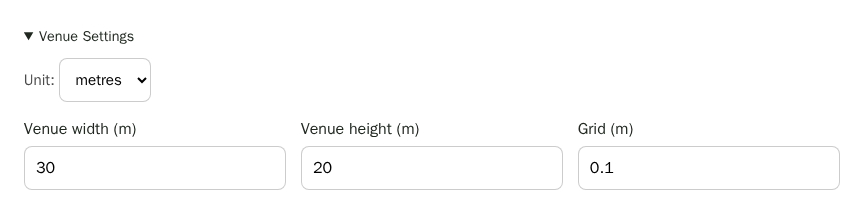
To add a background image — such as a venue map — choose a file from Background image. The image fits to the venue dimensions you entered. Wait for the upload to finish before changing the event date. Choose Save Floorplan to keep the image on this date. To change it, detach the image and upload a replacement. Uploads are retained so older layouts keep their image. A background stays private in a draft; publishing a floorplan includes its background in the public image and PDF, so check it for private details before publishing.

Adding Stall Spaces
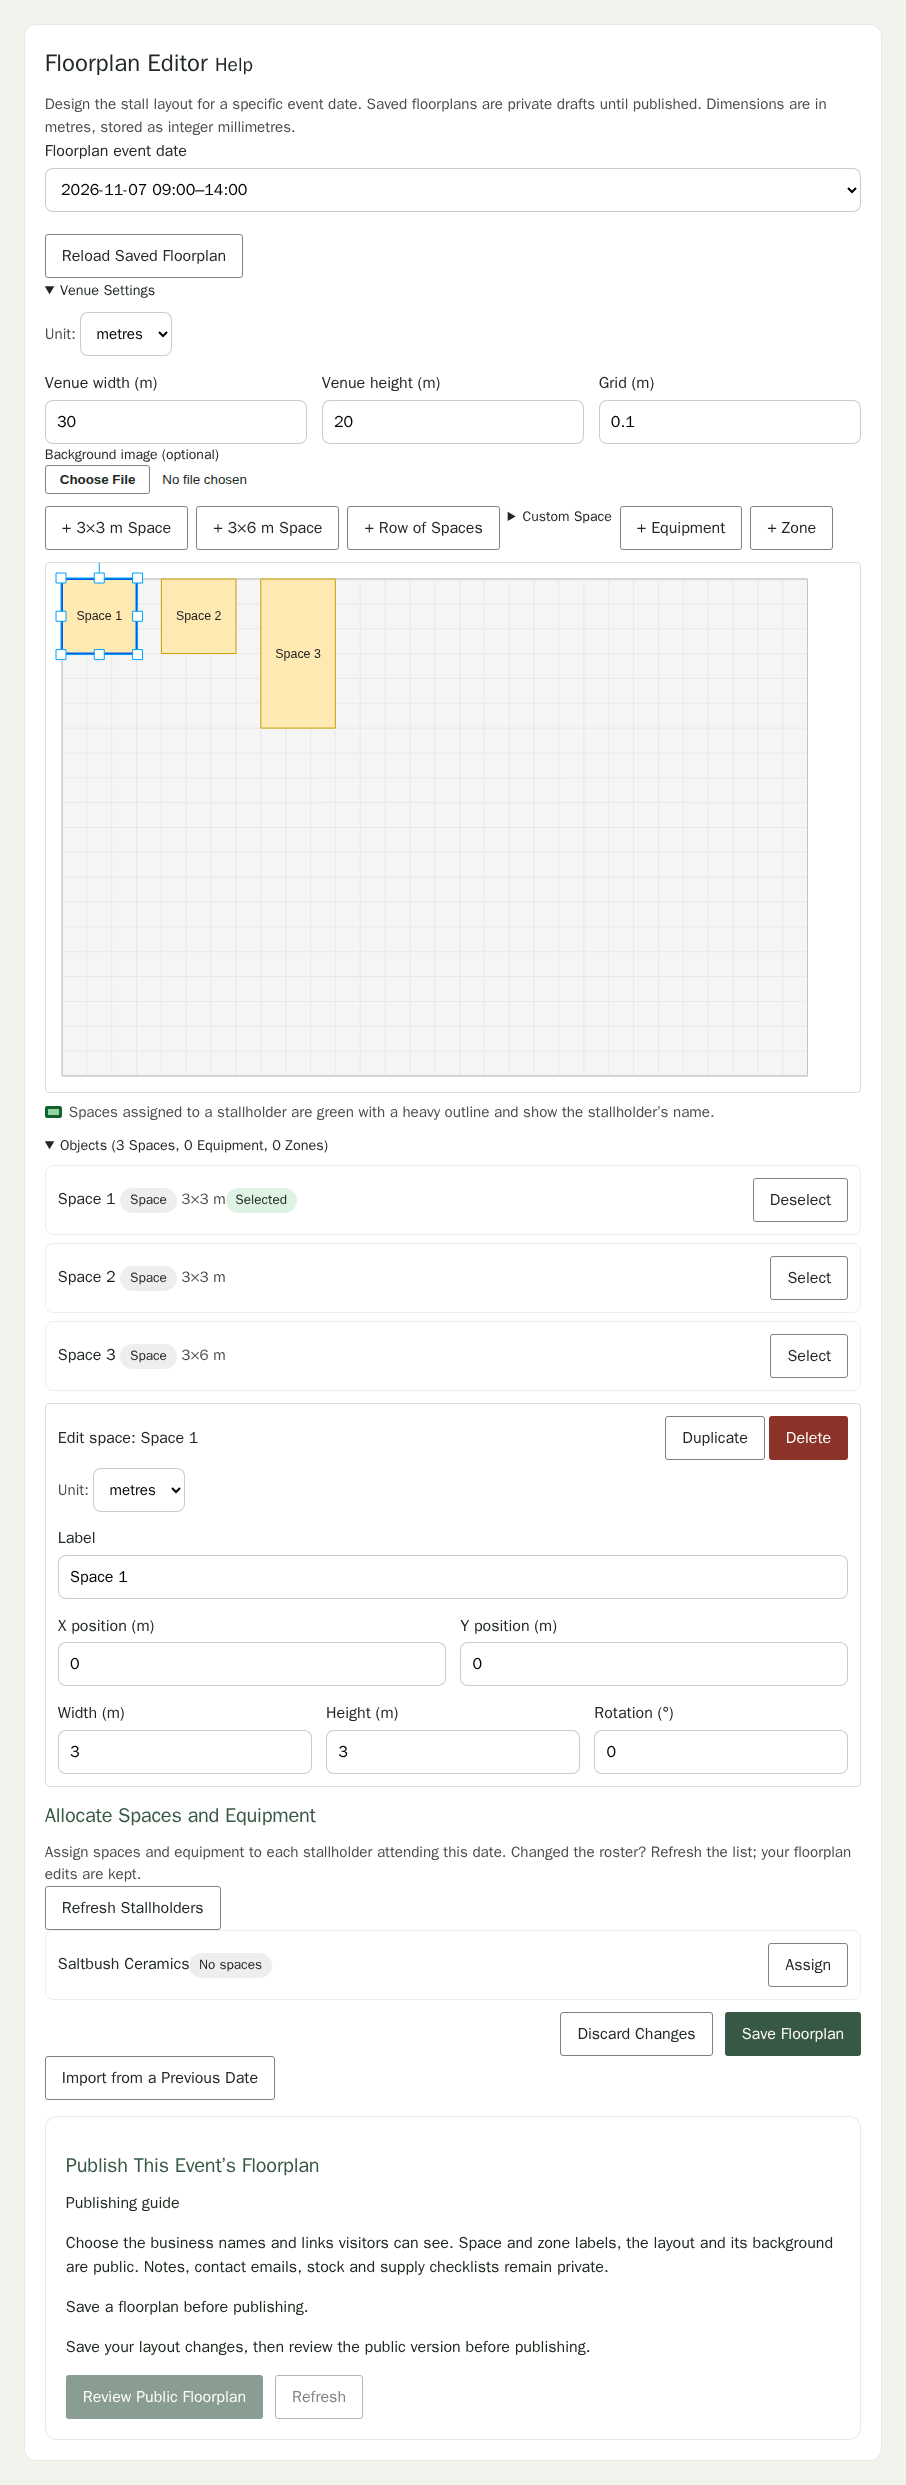
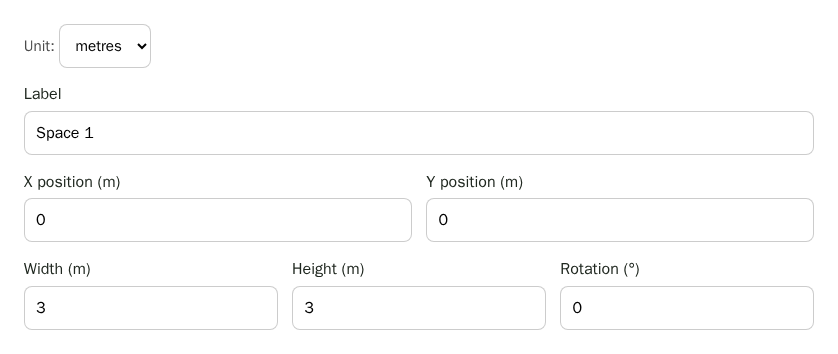
Choose + 3×3 m Space or + 3×6 m Space to add a preset. For other sizes, expand Custom Space, enter the width and height, then choose Add. Each new space is placed in the first free spot in the venue, so it does not overlap an existing space or a walkway, and gets the next unused label such as Space 2. It can be dragged to its position. If the venue has no free spot left, the space is placed at the top-left and you are told to move it. Select a space on the canvas or from the object list to edit its label, position, size, and rotation in the form below.
Generate a Row of Spaces
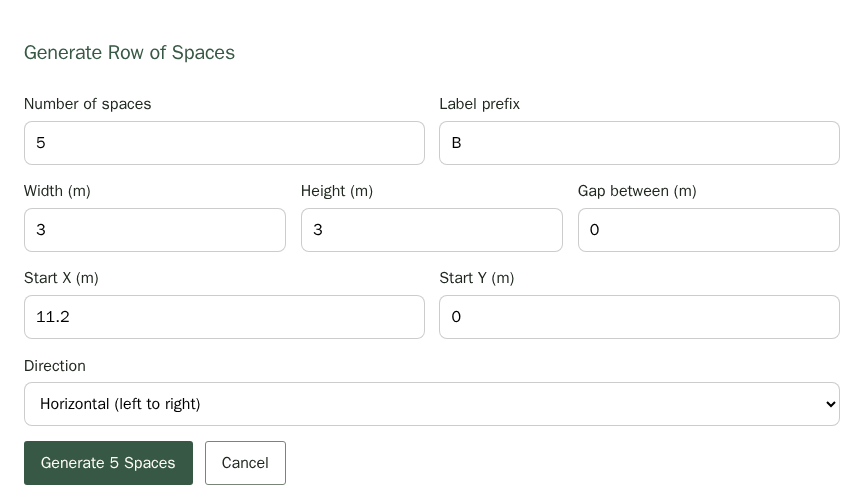
Choose + Row of Spaces to open the row generator. Set how many spaces to create, their size, the gap between them, where the row starts, and whether it runs left-to-right or top-to-bottom. The spaces are labelled automatically with a prefix and number — for example A1, A2, A3 — skipping any label already in use. The start position is filled in with the first free spot. Choose Generate to add them all at once; if the row would run outside the venue or over an existing space, you see a message instead and nothing is added.
Equipment
Choose + Equipment to see table presets, a gazebo, and a chair. Tables come in 4 ft, 5 ft, 6 ft, 8 ft, 1.8 m, and 1.5 m round sizes. Each piece of equipment has a Supply setting — organiser or stallholder BYO. Organisers can mark organiser-supplied items as confirmed when known stock is reserved.
Zones
Choose + Zone to add a walkway, exclusion zone, obstacle, or entrance marker. Zones that block movement — Walkway, Exclusion, and Obstacle — are shown in the validation summary if a space or equipment overlaps them. An Entrance zone marks where stallholders and visitors enter.
Editing Objects Precisely
Select any object on the canvas to open its edit form below the canvas. Use the form to set exact values in metres or millimetres. Type freely — for example 0.75 for 750 mm — and the value is applied, snapped to the grid for positions, when you leave the field or press Enter. You can also focus the canvas (press Tab to reach it) or the Objects list and use the arrow keys to nudge the selected object by one grid unit (hold Shift for ten grid units). Arrow keys with Alt, Ctrl or Command held are left to your browser. Drag handles on the canvas resize and rotate objects; all moves snap to the grid.
The Objects list below the canvas lists every space, zone, and equipment item. Choosing Select in the list selects that object, scrolls the edit form into view and moves focus to its first field — useful on small screens where the canvas is hard to tap precisely, and for keyboard and screen reader use. A screen reader announces the selected object's name, size and position. To deselect, choose Deselect in the list or click an empty part of the venue.
Allocating Spaces to Stallholders
After adding stallholders to the date using Stallholders by Date, they appear in Allocate Spaces and Equipment. Choose Assign next to a stallholder to tick which spaces and equipment belong to them for this date. On the canvas, a space assigned to a stallholder is green with a heavy outline and shows the stallholder's name. If you add stallholders to the date while the editor is open, choose Refresh Stallholders (the list also refreshes when you return to the browser tab); your unsaved floorplan edits are kept.
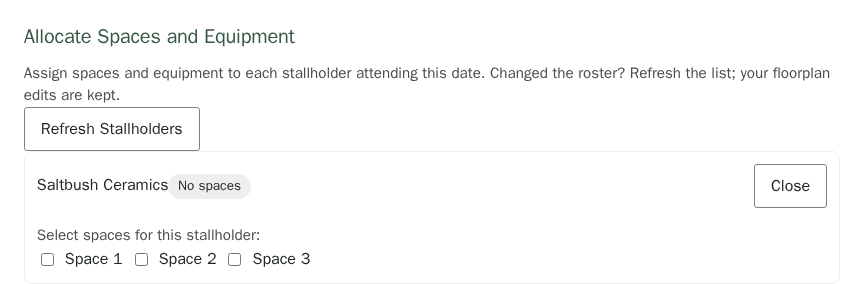
A stallholder can hold more than one space. If their spaces are not adjacent, a (disconnected) note appears beside their allocation. Each space can only belong to one stallholder at a time; occupied spaces appear dimmed and cannot be ticked for a second stallholder.
Equipment Availability
After adding equipment, the Equipment Availability table appears. It lists how many items of each type are needed in total, how many are organiser-supplied versus BYO, and how many organiser items are confirmed. Enter the total available quantity in the Available column to see the remaining figure. A red row means demand exceeds supply.
Saving the Floorplan
Choose Save Floorplan when you are ready. The save button is disabled if there are validation errors — fix them first; if the server rejects a save, the reasons are listed too. Changes you make while a save is in progress stay marked as unsaved. The browser warns you before you leave the page with unsaved changes. The floorplan stays as a private draft. To share it, separately review and publish a public revision using the publishing section below the editor. Saving changes never updates an existing public revision or sends email.
Importing from a Previous Date
Choose Import from a Previous Date to copy a previous layout as a starting point. Beside a source date, choose Import Draft or, when available, Import Published to use its latest published revision. Spaces, zones, and equipment are copied with new IDs — they are independent of the source. All allocations are cleared; check Propose previous placements for review to see suggestions based on who was placed before.
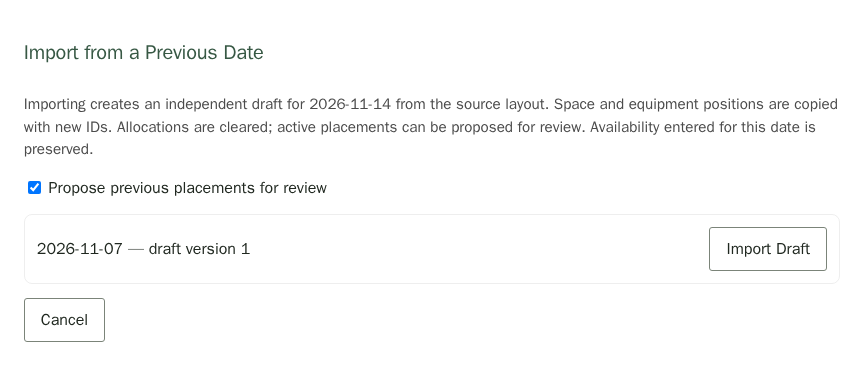
Proposals appear under Review placement proposals. They are not applied automatically — choose Apply Proposal to accept each one individually. A space occupied by another stallholder cannot receive a proposal; a conflicting proposal is refused in full so it never silently assigns only part of a previous stall.
If you have unsaved changes, you are asked to confirm before an import replaces them. If the target date already has content, check Replace existing content before importing. This clears the current layout before applying the import. Availability figures you entered for the target date are preserved.